

Next week from 1st September things are changing slightly so that more ProMarker lovers can join in. We will also be welcoming our first 2 guest designers, they are going to be staying with us for 4 weeks and they are,
This week Caryn has done a tutorial for her image that she is using for her challenge on Tuesday,
******************
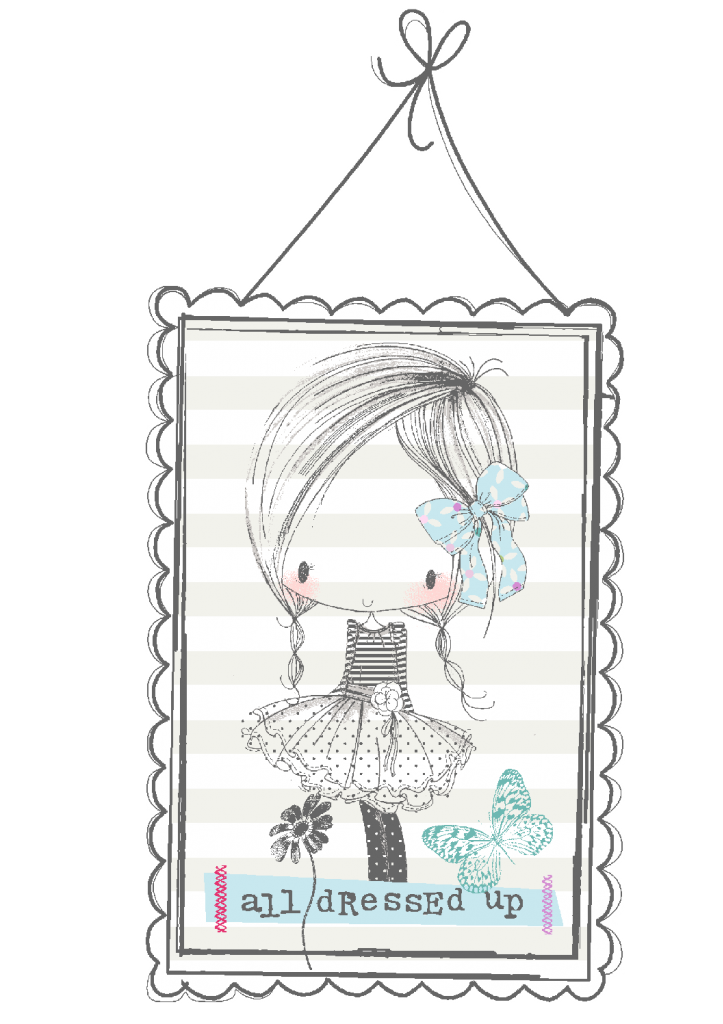
Glittery and Girly image tutorial - CarynThis is the image I have chosen for my card for next week’s challenge. I start by picking out my chosen colours usually dictated by the patterned paper I’m using – in this case the Chester range from Me and My Big Ideas.
Firstly I have coloured the boots, skirt and top with red, rose pink and mandarin respectively. I then go over the darker areas again where you would expect to find shadows (folds and curves).


I then take a darker shade of each of the main colours – in this case, Berry red, orange and coral and go over the darker areas again to give more depth. For the skin I start with a base layer of Ivory and then add dimension with Vanilla and Blush.


I have then used the blender pen over the colours to smooth out any harsh lines. For the hair (I’ve opted for blonde on this occasion) I start with a base of Gold leaving areas where the light would hit off it.


I have then gone over the Gold with Canary covering a part of the white area I left on the previous image. To give the effect of curves and shape to the hair I add depth at the roots and tips by going over again a few times with the Gold colour. In the final image I have coloured the wings with Satin and then used a quickie glue pen and sprinkled with Glamour Dust before going around the whole image outline with Cool Grey 1.

Well, hope this wasn’t too patronising for you– I hate to think I’m teaching Grandmother’s to suck eggs (must find out where that saying comes from!) but it’s sometimes interesting to see how other people’s methods might differ from our own. Hope it’s been of use to some of you anyway.

Hugs,
Caryn xxx
******************
coming up NEXT WEEK – Blonde hair tutorials
If you do want to see anything else made into a tutorial just let us know, we have had quite a few suggestions that we are working on and we are hoping to get those to you very soon :)
Gina, Denise and the DT


14 comments:
Excellent, thanks so much.
Pinky
hi so pleased to know i am using the correct colours.
Not teaching anyone to suck eggs! I'm an absolute beginner so the tutorial is fab! Thank you.
thanks for great tips, i'm new to all this colouring with pro makers.
i hate aking as i always feel dum asking .
huggs jo x
thanks for great tips, i'm new to all this colouring with pro makers.
i hate aking as i always feel dum asking .
huggs jo x
i rely on the workshops lol have loads of promarkers but not great with shading an light,so your explanation is great for me
thanks xx
Love the workshop, only just started using Promarkers and can't seem to get my shading right. The way you have listed the colours used is fab, hope the tips keep coming
Hugs
Christine xxx
Many thanks for this tutorial, I always have problems with hair and where to leave the white bits. Thanks again and am off to buy some more PMs. Debs x
Brilliant, thank you so much for the tutorial, I am new to Promarkers and need lots of help x
You're not being patronising at all. I love these tutorials and am trying to improve my shading. It isn't easy and its great to see how you use the PMs. Marianne x
There hasn't been a tutorial yet that I haven't found helpful. Thanks for taking the time to put them all together.
Lynne.x
Thanks so much for this tutorial, its very much appreciated, Me I need all the help I can get.
issy
thanks for this fabby tutorial,gonna go and try it out:)
sue
xx
as a newbie to Promarkers I find these step by step instructions incredibly helpful so please carry on with them. My problem is that I don't have enough colours and the tutorials help me decide which ones go to the top of my list.
Post a Comment